You are viewing an old version of this page. View the current version.
Compare with Current
View Page History
« Previous
Version 3
Next »
1. Create Project
Step 1 - Click [] in navigation bar. |
|---|
Note: if the link not included in navigation bar, click Search button then enter jobs into search box.. 
|
Step 2 - Create new Job by copy from template. |
|---|
Select Template then choose action Process => Copy Job 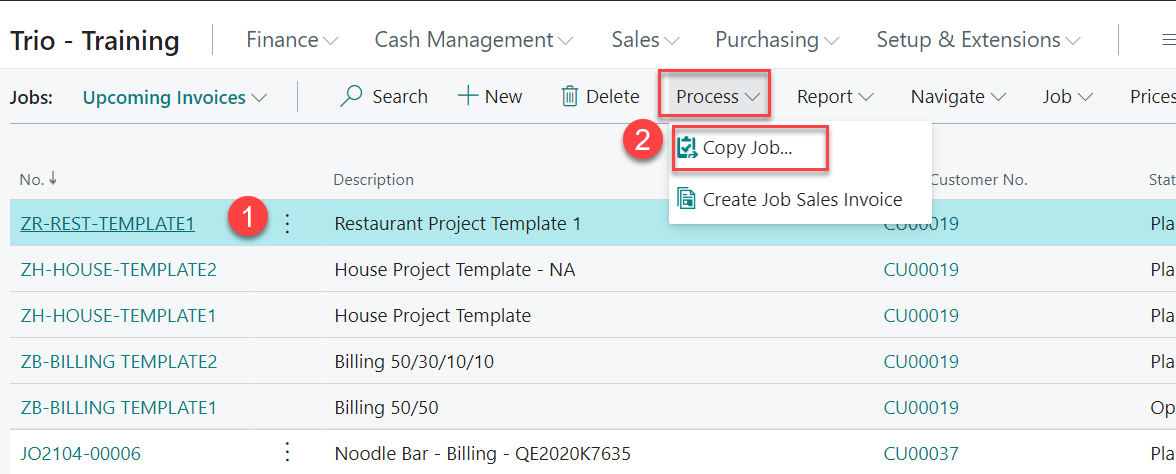
|
Select Job Tasks No. it needs to copy from the template, then click OK 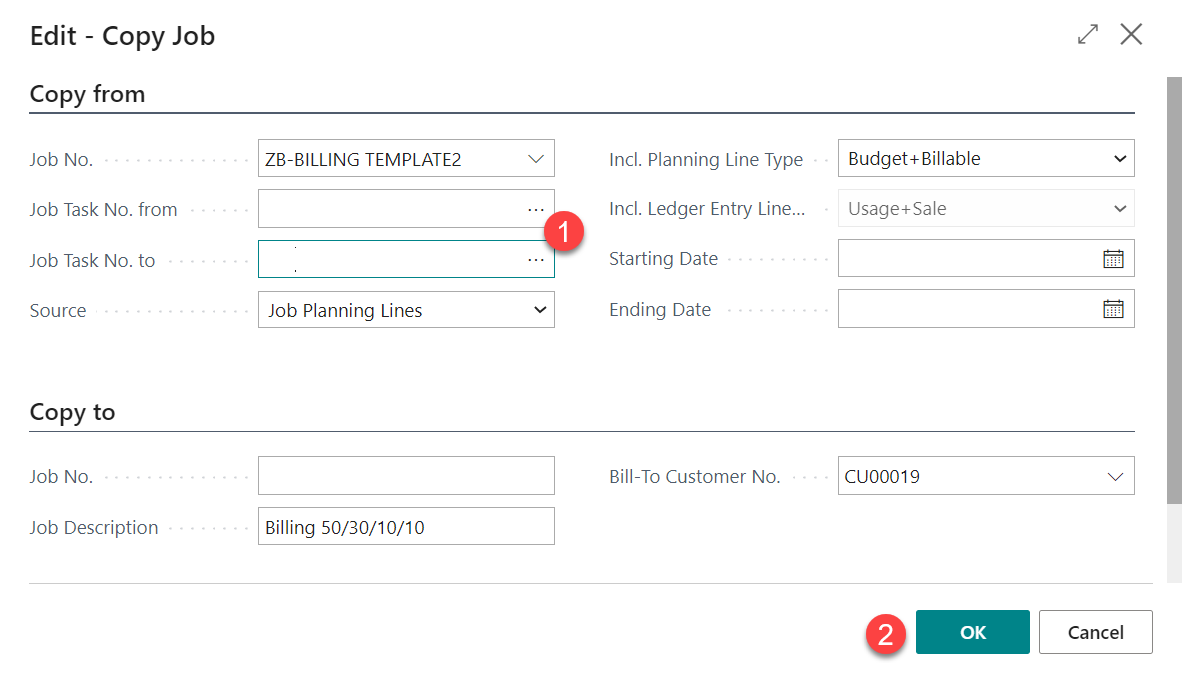
|
|
Step 3 – Enter Job information. |
|---|
Change the data it copied from Template. The key information for Job Card as mentioned in the table below:: Fields | Details | No. | Auto Generate by system | Description | Enter the Job Description | Bill-to Customer No | Select from Customer List. | Bill-to Contact No | Default from customer, user can select another contact for the customer if needs | Project In-Charge | Select from Resource List. | Project-in Charge Phone | Default from selected Project-In-Charge | Person Responsible | Select from Resource. Responsible Person = Site Forman in project schedule excel | Person Responsible Phone | Default from selected Person Responsible To be show in project schedule excel mobile for site foreman | | Project Code | If Quote confirmed and the project code is created |
|
2. Create Job without copy data from existing record
1 - Select action New to create new job card |
|---|
|
2 - Enter Project Information |
|---|
Key information for job as below: No. | Auto Generate by system |
|---|
Description | Enter the Job Description | Bill-to Customer No | Select from Customer List. | Bill-to Contact No | Default from customer, user can select another contact for the customer if needs | Project In-Charge | Select from Resource List. To be show in project schedule excel | Project-in Charge Phone | Default from selected Project-In-Charge To be show in project schedule excel | Person Responsible | Select from Resource. Responsible Person = Site Forman in project schedule excel | Person Responsible Phone | Default from selected Person Responsible To be show in project schedule excel mobile for site foreman | | Project Code | If Quote confirmed and the project code is created |
|
3 - Enter Job Tasks information |
|---|
Key information for Job Task as below Field Name | Remarks |
|---|
Job Tasks No | For Project Schedule Job Tasks No. = column [Item] in project schedule excel For sorting and sub task’s purpose, suggest use 4 digit and beginning with 0100. For Billing Schedule Job Tasks No. = "payment for installment" show in sales invoice printout e.g. DEPOSIT, 1ST PAYMENT etc | Description | Enter the Tasks Description | Job Tasks Type | For Project Schedule Select Heading if the tasks have sub-tasks For Billing schedule may not have sub-tasks, remain the default Job Task Type "Posting |
|
| 4 - Enter Job Planning Lines |
|---|
1) Select Job Tasks 2) Select Line => Job => Job Planning Lines 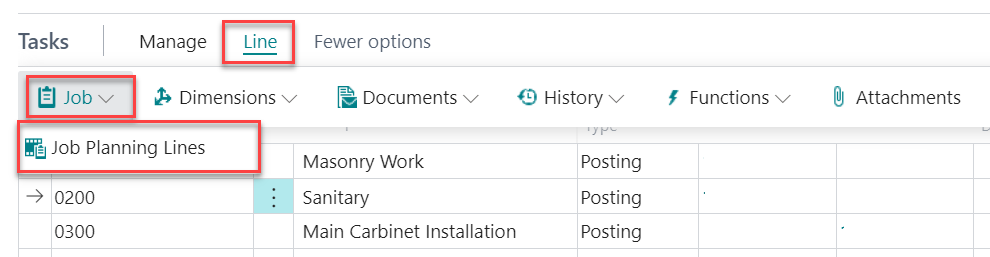
|
For Project Schedule Enter the plan start date for the tasks in 1st line then enter the plan end date in end line. For example, Task 0200 Duration from 1/28/2021 to 1/30/2021 *add line for start date and end date and enter the planning date only. No need to edit other fields. 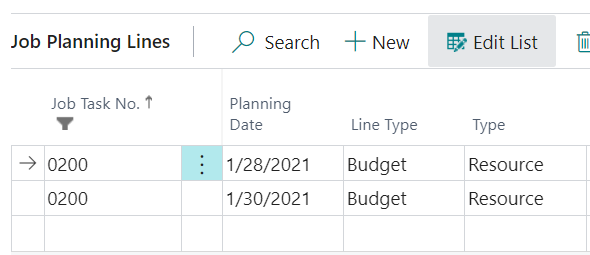
For Billing Schedule Enter 1 job planning lines for each installment (i.e. Job Tasks) Fill up the key fields below: | Field | Description |
|---|
| Planning Date | The planned billing date | | Line Type | Billable | | Type | Item | | No | Select from Item Card - the item created for the payment description | | Quantity | 1 | | Unit Price | Enter the planned billing amount | | Line Amount | Calculated by system |

|
Tips: manage job planning line for all tasks
| 1 | Click on the Start Date |
|---|
| |
| 2 | Clear the filter for Job Task No, |
| |
| 3 | Click Edit List to edit the Job Planning line for Tasks |
| |
3. Add attachment to jobs
| 1 | Select Job from Navigation bar then select appropriate action button |
|---|
| Open the job card, then select Process, Attachment 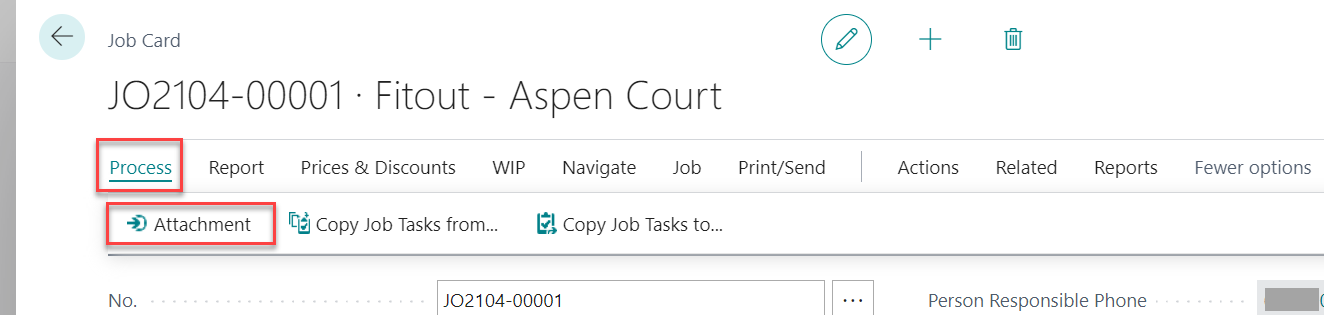
|
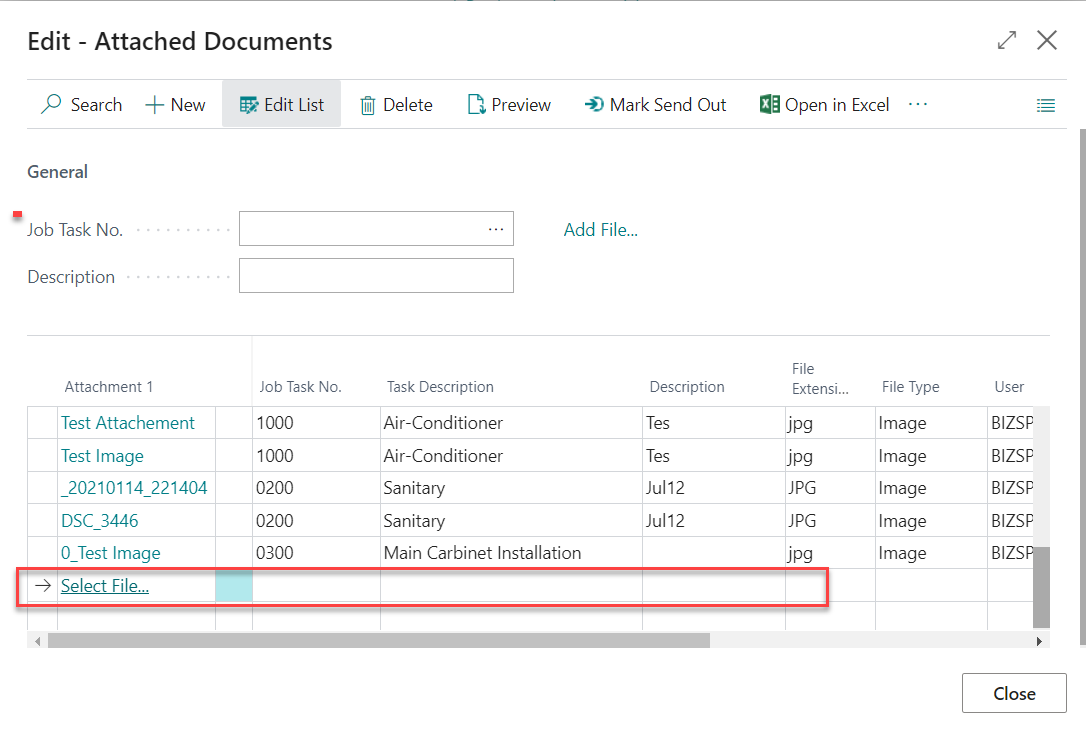
| Attachments page to be shows. Follow the steps below to add an attachment. - Click on the new line. link "Select File..."to be show
- Click the link “Select File…” to select file from your disk.
- (Optional) Enter the Job tasks No. for identify the attachment is related to which tasks.
- Task Description – System shows the tasks description for reference.
- (Optional) Enter the Description for the attachment
- (Optional) Select Type from a list e.g. From Customer, Send Out etc.
- File Extension and File Type to be auto detected and fill up by system.
- User to be auto populated by system according to the login user.
|
| Attachments button also available in Tasks Tab Actions => Line and Attachments 
|
| 2 | Mark Send Date for the attachment |
|---|
| To mark the Send Out Date, either select Actions, Mark Send Out or pick date from Calendar 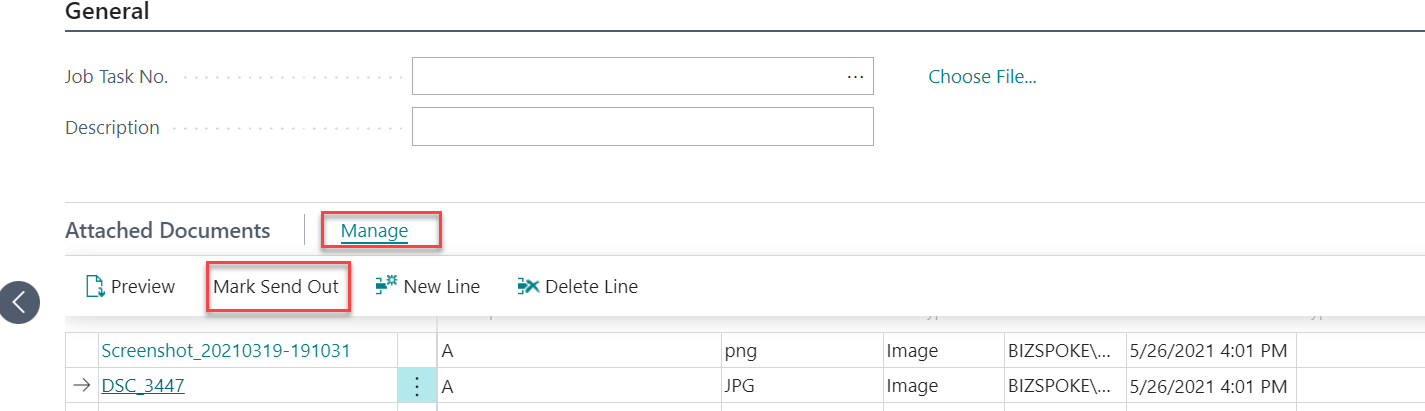
|
4. Update Dimension to Job
Step 1 - Select Job from Job list then select action Job => Dimensions-single |
|---|
Update Dimension (i.e. Project Code) to Job without open the Job Card 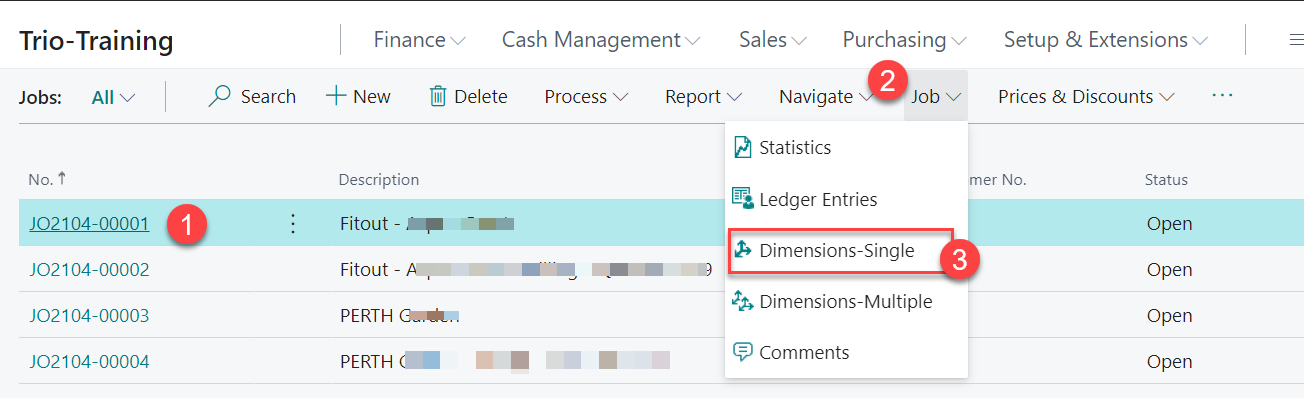
|
Step 2 - Select [Project] for Dimension Code then select the project no. in Dimension value code. |
|---|
1) Select Dimension Code (i.e. Project) 2) Select Dimension Value Code 3) Value Posting - select Same Code 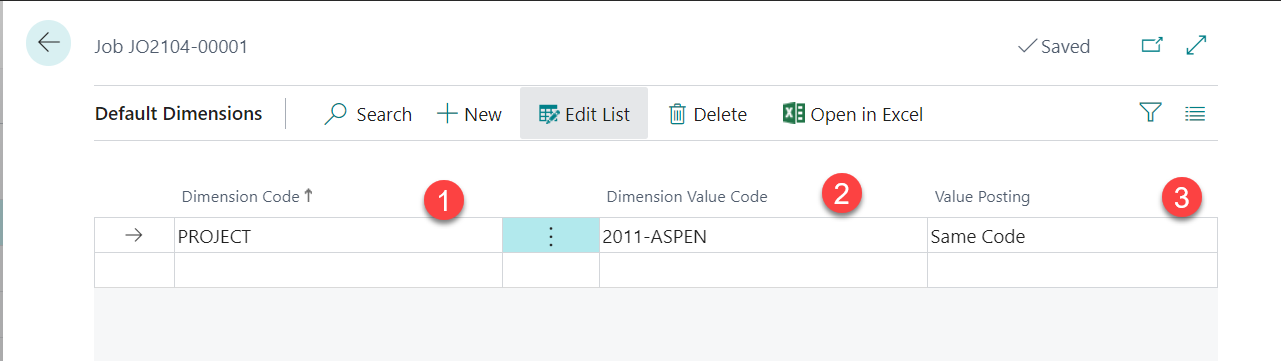
|


