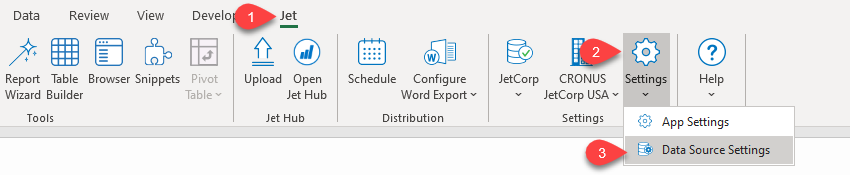
The Data Source Settings are used to define one or more database connections.
Once the Jet Excel add-in has been installed, Dynamics 365 Business Central has been configured to access your local Business Central data, and Web Services have been configured for access from the Jet add-in, it is an easy matter to configure your data source settings. You will need to know the Server Name, Instance, SOAP Services Port, and whether SSL is enabled for SOAP Services.
Step-by-step guide
Gathering Information
- We recommend contacting your system administrator to determine the correct Server name and other settings. You may be able to determine some of this info from other colleagues itself.
The type determines which data source matches the current requirement.
Web Services - On Premises (Please jump to step2 and continue setup)
Direct SQL Server (Please jump to step7 and continue setup)
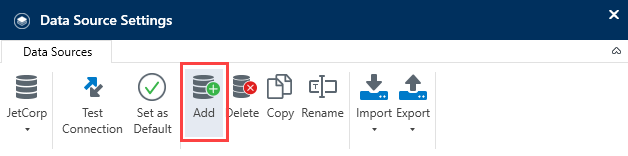
- Click the Add button at the top of the Data Source Settings window...
- In the New Data Source window...
Give your data source a descriptive name.
For the Database Type, select Dynamics 365 Business Central.
For the Connection Method, select Web Services - On Premises.
Click OK.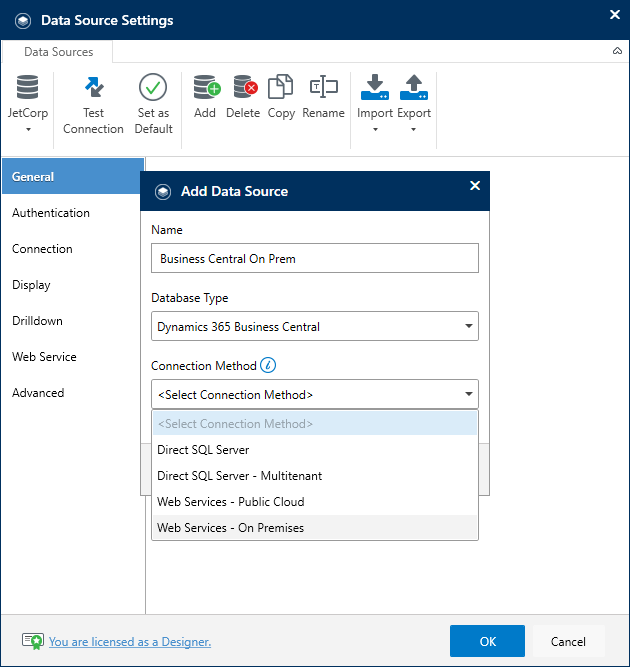
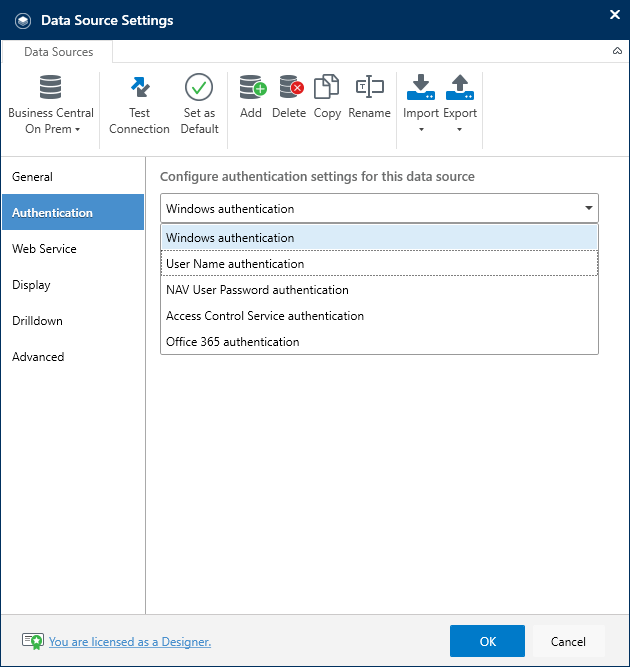
- On the Authentication tab, select the credential type which is configured for your Dynamics Web Services...
- On the Web Services Tab...
Enter the Server, OData Services Port, and Instance.
If your Web Service is configured to use SSL encryption, check the Use SSL Encryption box.
Pick the Jet_Data_Source (JetDataSource in later versions) codeunit.
Select the name of the Company you would like to use.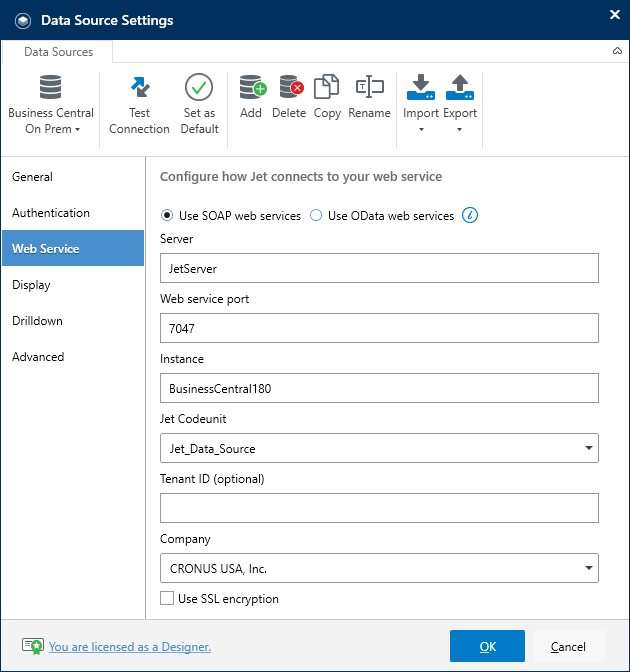
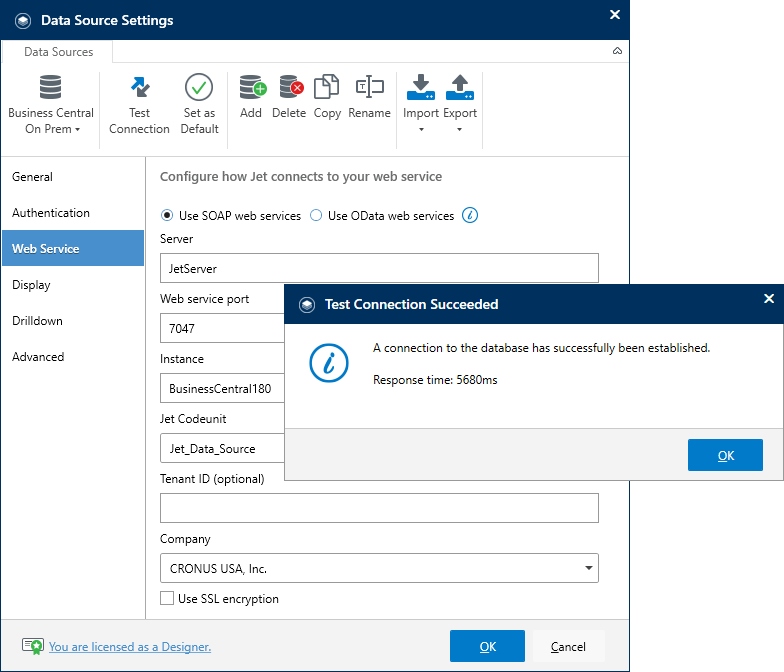
***Please note, Microsoft announced changes in Business Central 2021 release wave 2 (version 19.0) that SOAP has been superseded by OData V4. It's recommended that integrations are migrated to OData V4 as soon as possible. - Click the Test Connection button at the top of the window.
- Click Add on the Data Source Settings tool bar.
In the Add Data Source dialog, give your data source a unique and descriptive name, choose Dynamics 365 Business Central from the Database Type pull-down list, then choose Direct SQL Server from the Connection Method pull-down list.
Click the Add button.
- On the Authentication tab...
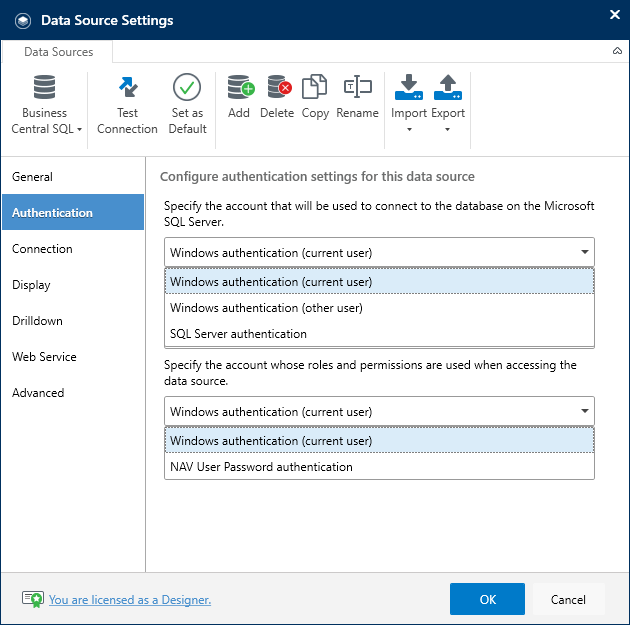
***If your SQL Server is configured to automatically recognize the user names used to log on to Windows, you can use one of the "Windows Authentication" options (either the current Windows user or another Windows user).
Once you have specified how to access the SQL database, you will then want to specify which BC user will be used when determining the roles and permissions used to access the BC data. If your BC system is configured to recognize the user names used to log on to Windows, you can choose to use the current Windows users. Otherwise, Jet Reports also supports the use of NAV User Password authentication.
If your SQL Server is not configured to recognize Windows user names, you will need to choose SQL Server Authentication and provide the user name and password for an account that does have permissions to access the SQL Server. - On the Connections tab...
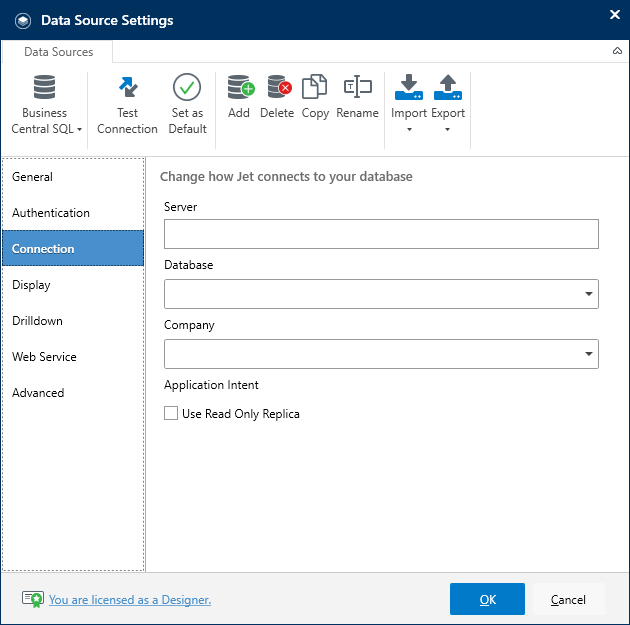
You will need to provide the name or IP address of the SQL server where your BC database resides, select the specific BC database you want to use, and then select the company within that BC database that you want to use by default (even is there is only one). Click Test Connection to test your connection to the database

- If you want your Business Central data source to be your primary data source, click Set as Default.
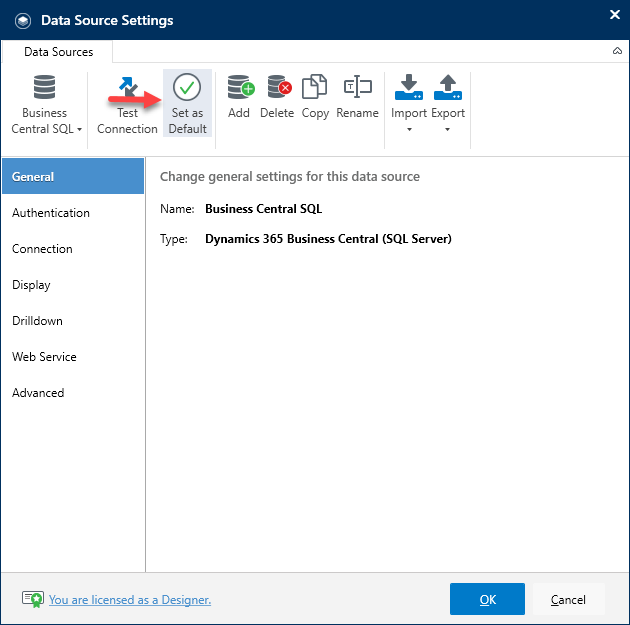
Click OK and your new Dynamics 365 Business Central data source is ready to be used in Jet Reports.